As a manager of multiple teams, you may be required to do the registration yourself. If this is the case, it is important to understand the entire process to ensure a successful and simple registration.
In order to register in MonClubSportif, we offer you the Registration tab.
In order to better understand how to use this function in the application, the process will be presented to you with a supporting case study.
Case Study → I work at a high school and as the athletic director, I have to take care of my winter season for all the high school 5 sports teams.
In order to manage all of my teams through MonClubSportif, I must first do the official registration in the app.
Warning #1. Before you begin this process, make sure you have already added your Categories (see the following article) as this is a prerequisite step.
Warning #2. Be aware that you can leave the registration process and that your data will be saved. There is no risk of losing your work in progress.
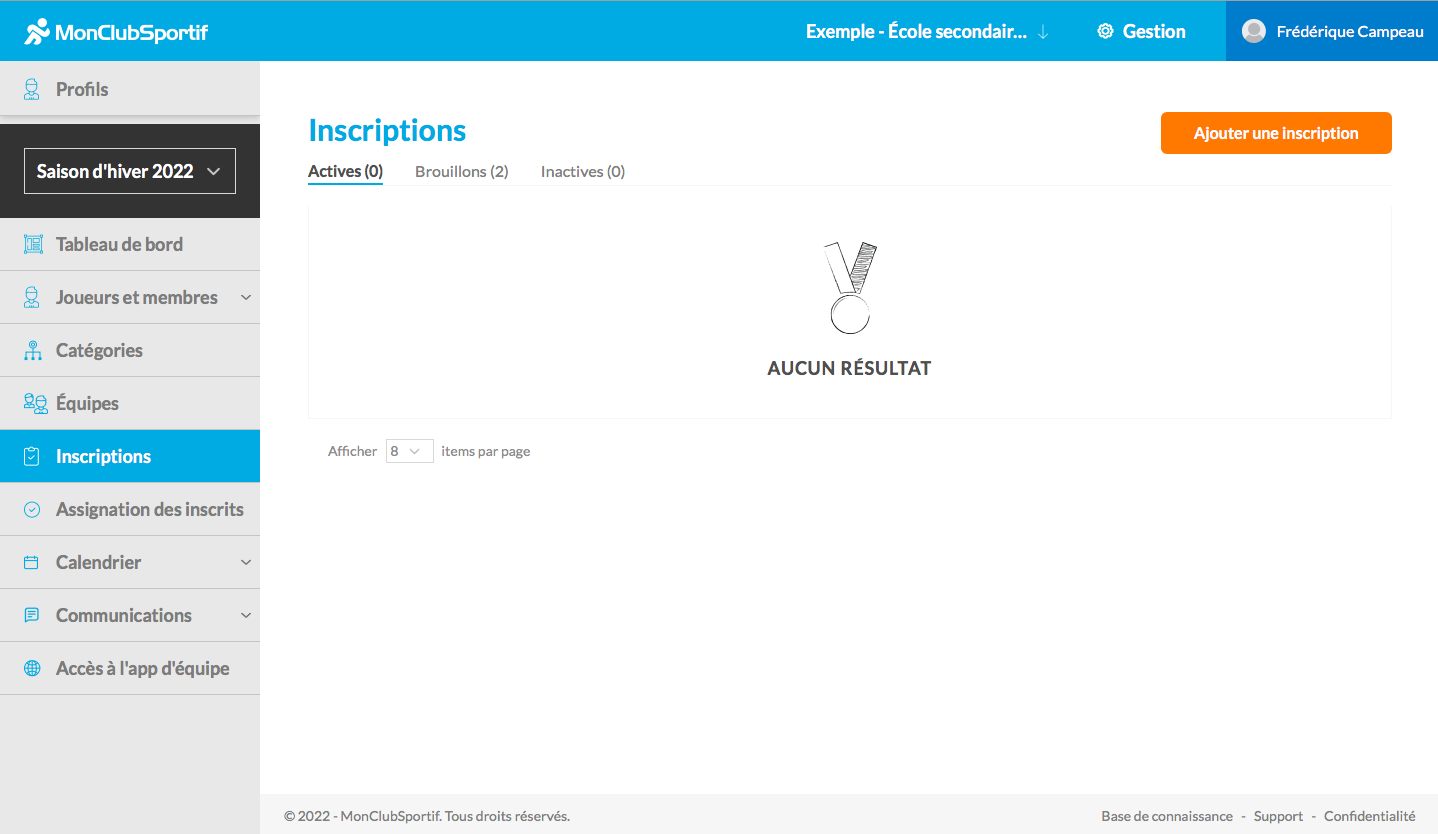
Step 1:
To register, first click on the Registration tab (in blue) on the left sidebar. Then click on the orange Add Registration button (on the right) to begin the process.
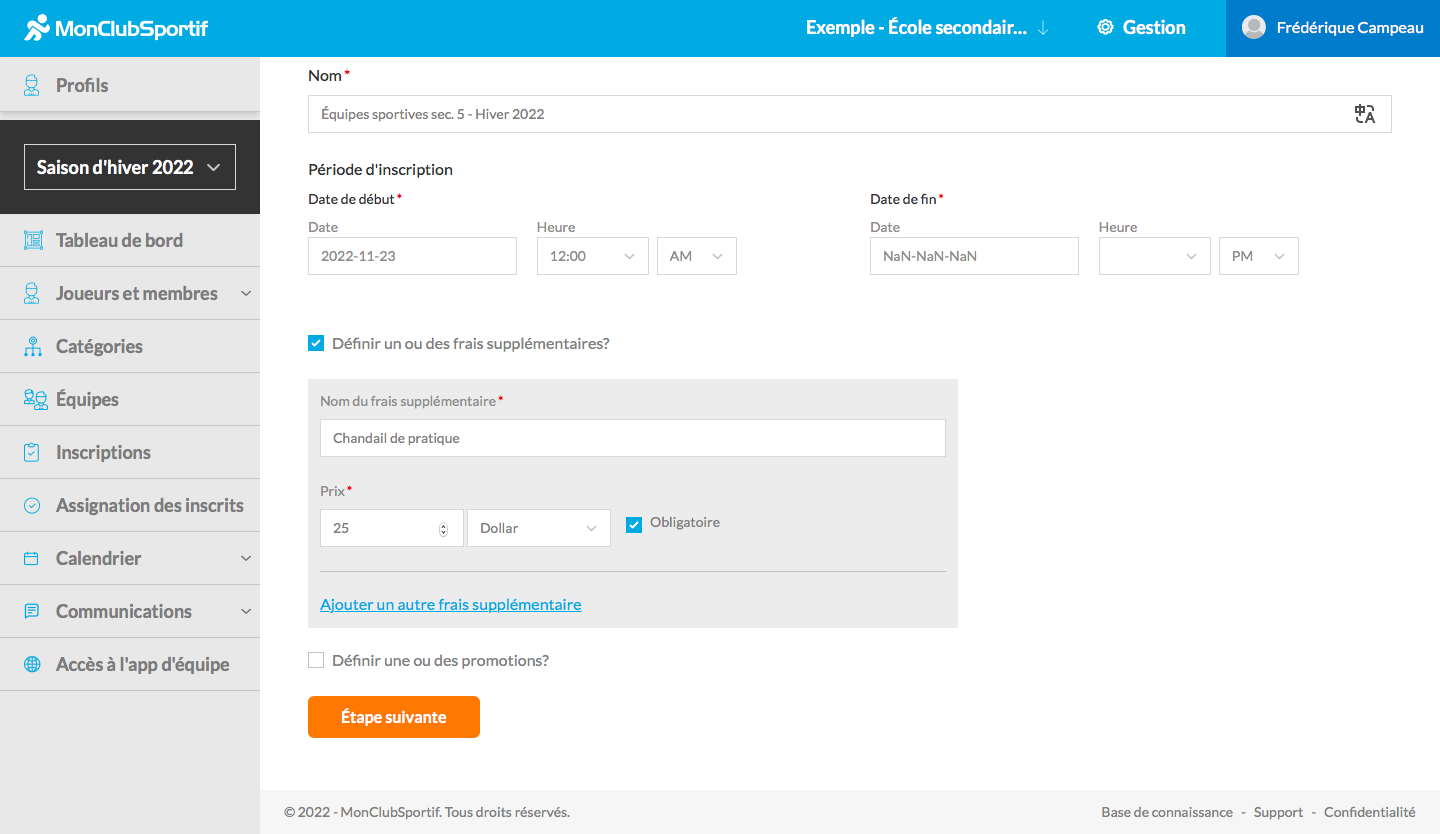
Step 2: Settings
You must first give a name and a period (start and end) to this registration.
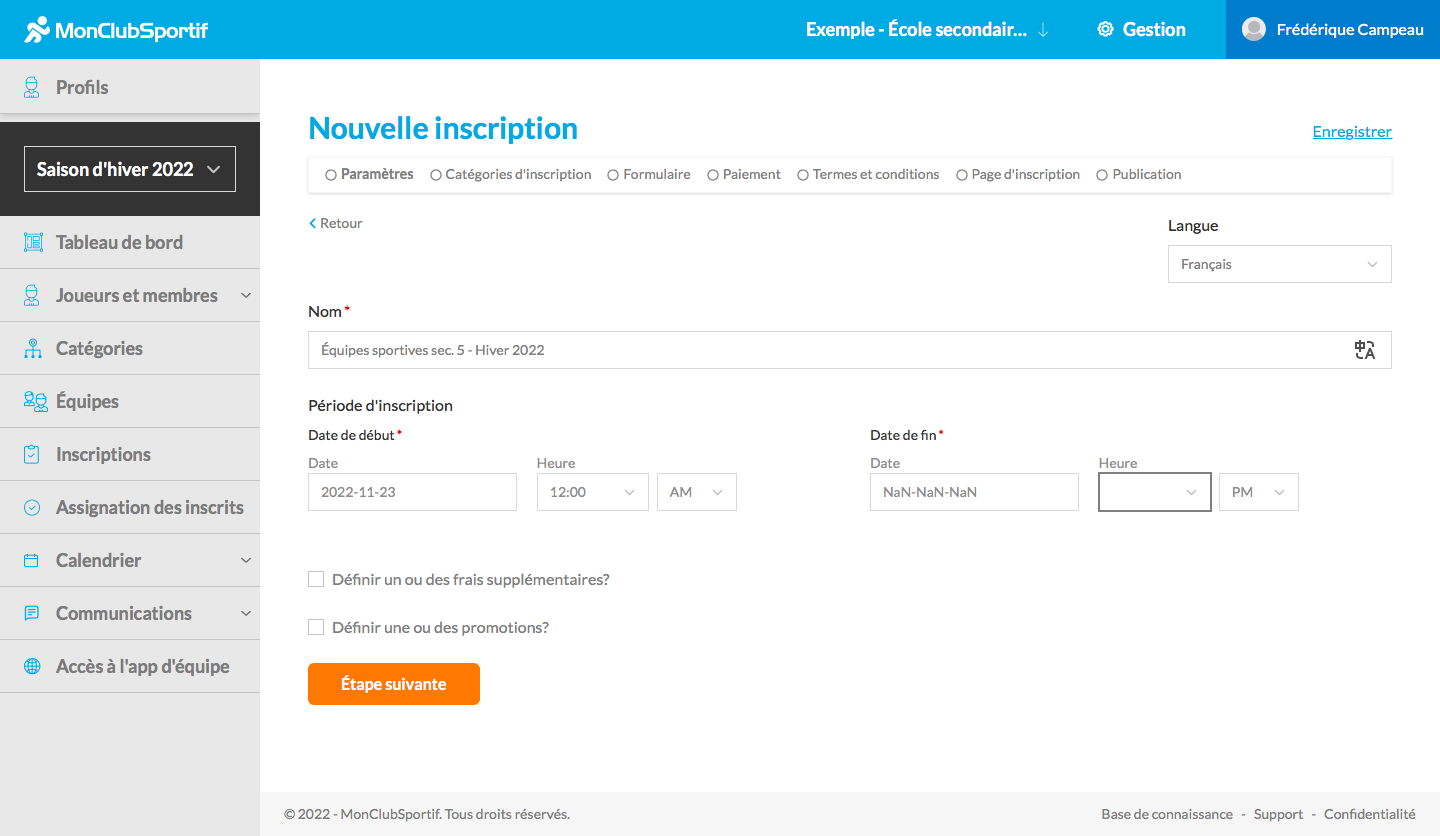
Case Study → In my case, this is a registration I’m doing for the high school 5 sports teams for winter 2022. So, I will write the title shown in the image above. Then, I’ll add the start and end dates for this registration period.
Step 3:
If this is your situation, you can then check the box Define additional fee(s) (e.g. team jersey). This will allow you to customize your registrations to your organization’s specific needs.
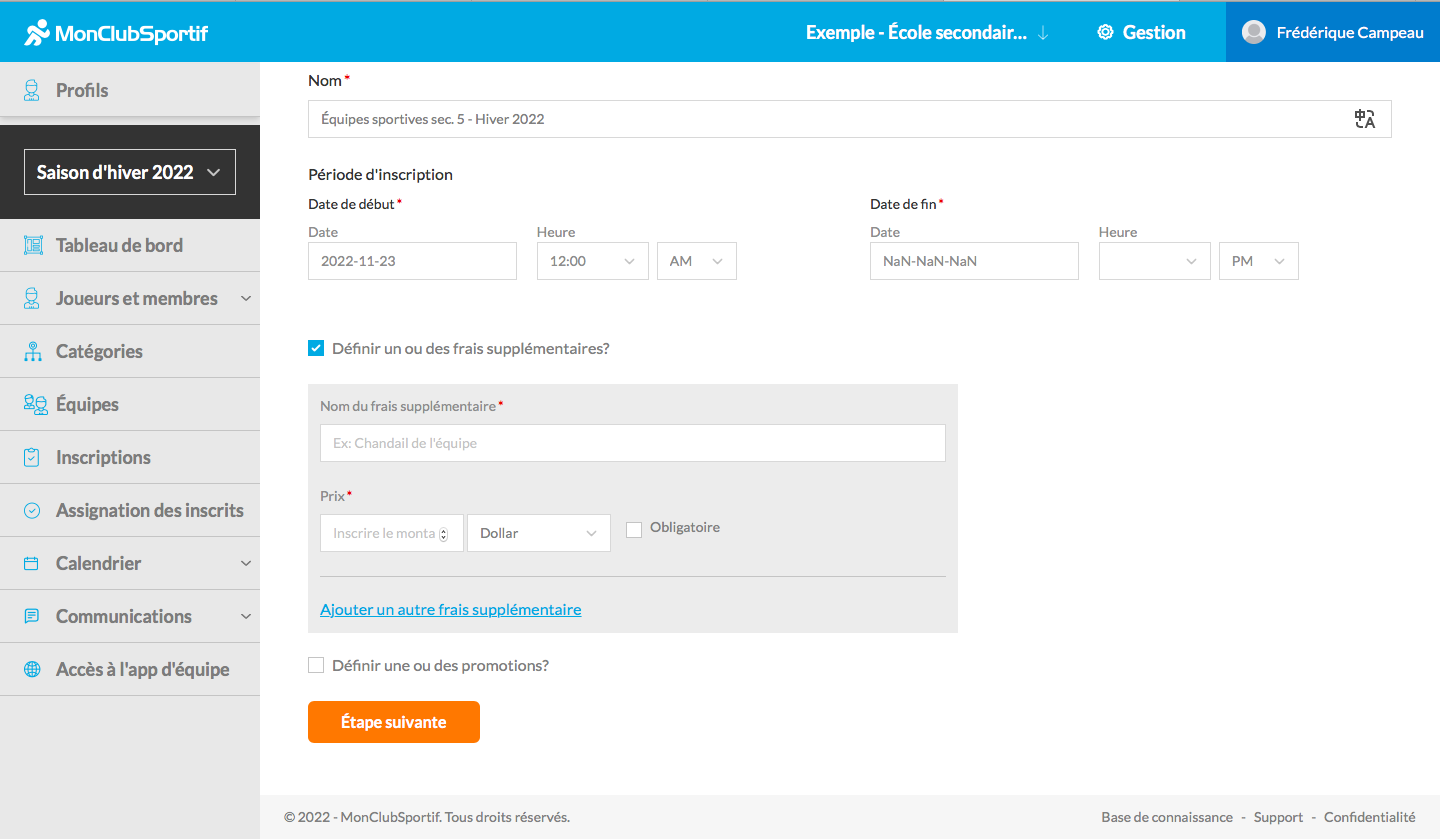
Case Study → In the case of my school, we want every athlete to pay for a practice shirt at practices. So I need to add the name of the extra fee, the price, and check the little Required box because this is a mandatory fee that everyone must do. It is not an option.
Step 4:
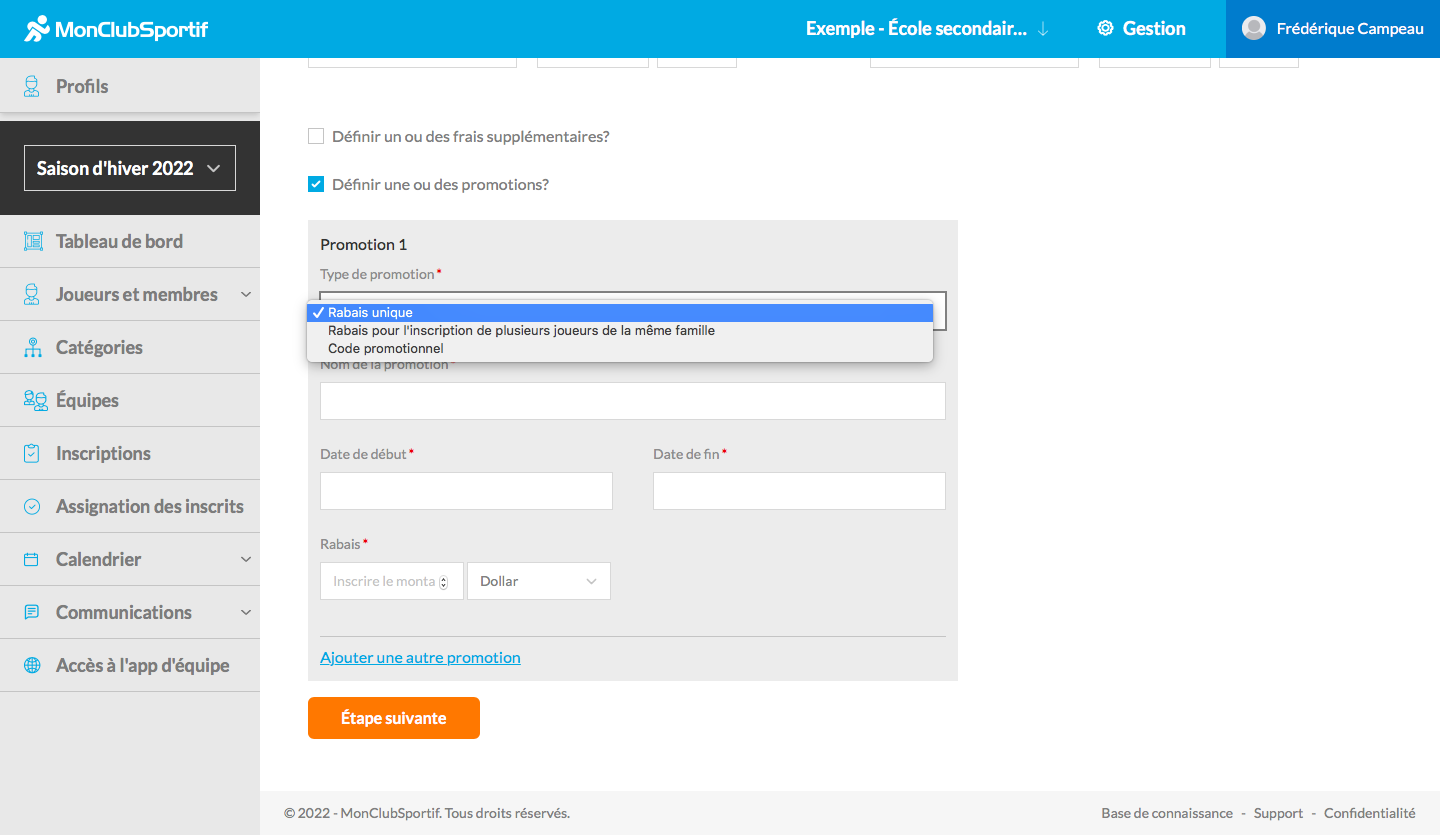
If this is your situation, you can check the box Define a promotion or promotions according to the reality of your organization.
There are different options and you can add more than one.
- Single discount
- Discount for the registration of several players of the same family
- Promotional code
For each promotion, you must enter its name, duration and the amount of the discount.
Then click on Next Step to complete this first page.
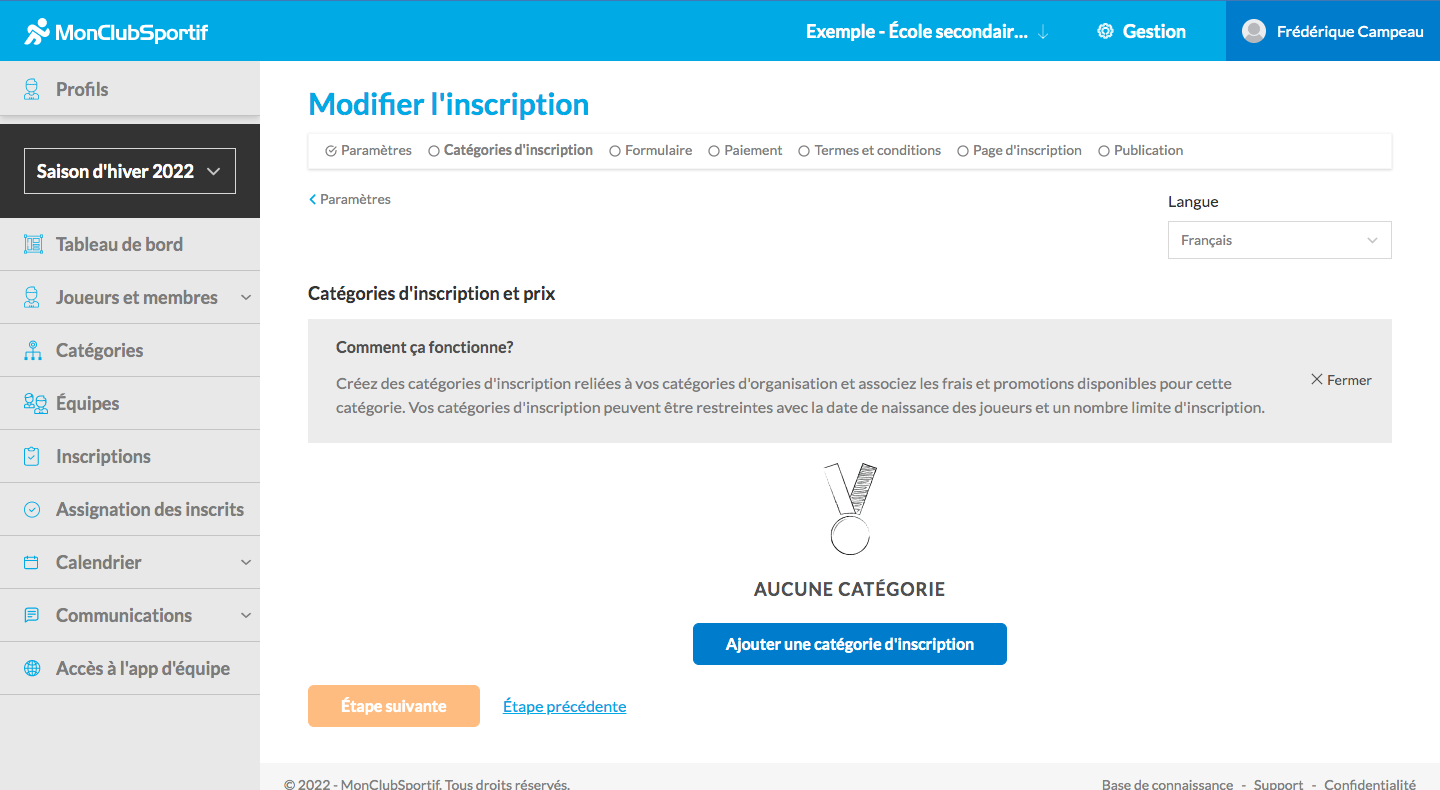
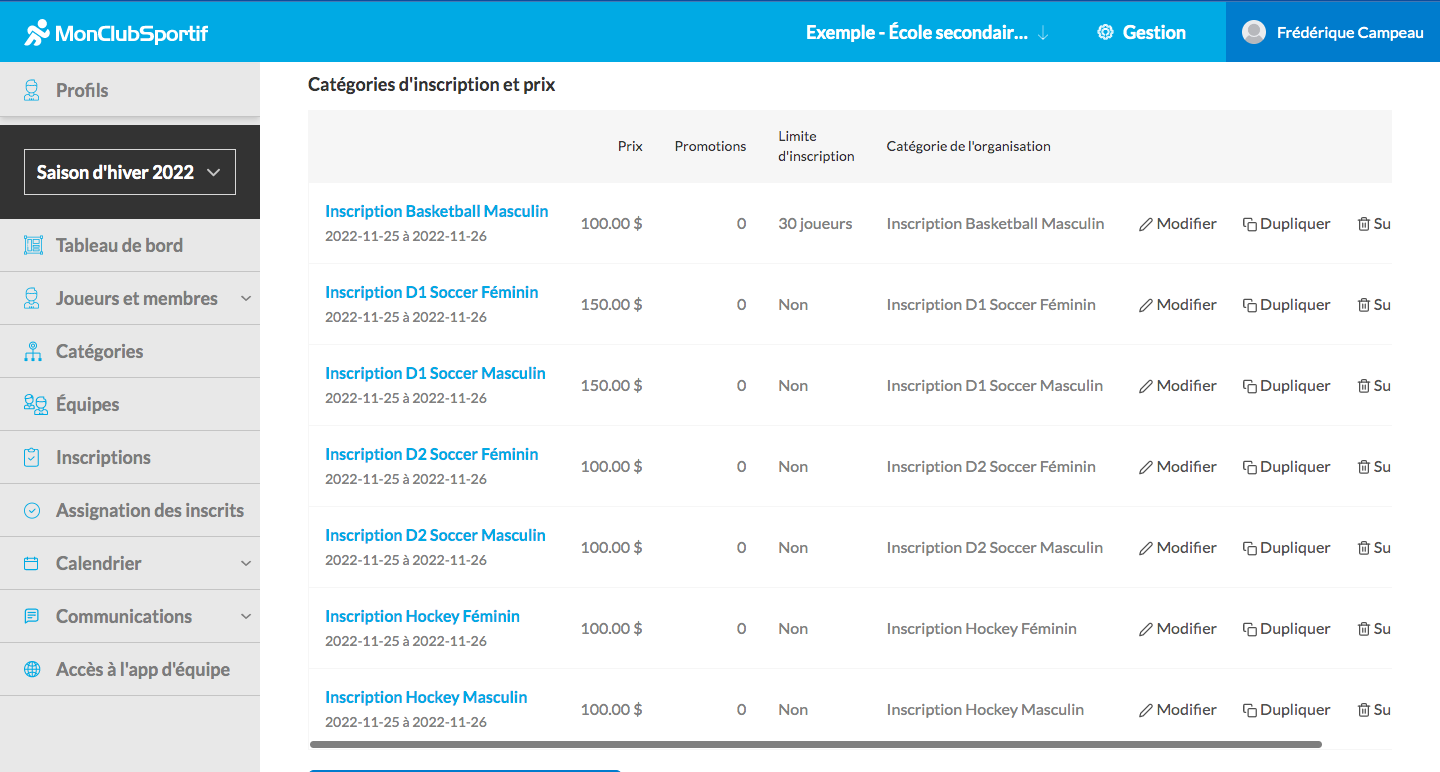
Step 5: Listing categories
You will now need to add your registration categories which are the same as those added in the Categories tab.
You will click on the blue button Add a registration category.
Note. The categories you choose should be the same as the ones you created before. If you have not yet completed this step, go to the following article to complete the process.
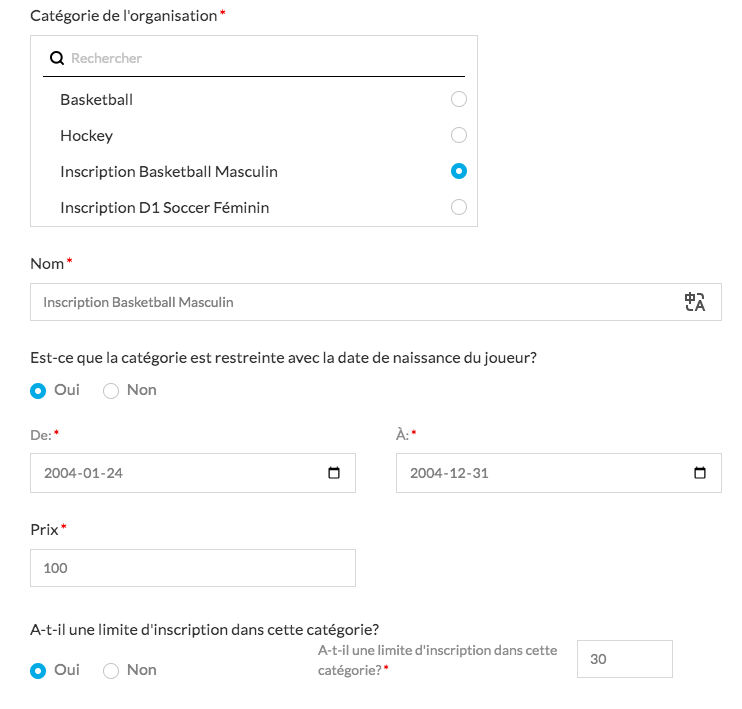
Here is an example of how to enter Men’s Basketball.
You must specify:
– If there are any restrictions with the player’s date of birth.
Please note! The date must correspond to the age of the players to whom the registration invitation will be sent.
– The price
– If there is a registration limit in this category
Then click on the orange button Register.
Step 6:
Repeat step 5 for all the categories you wish to add to your registration.
Take this opportunity to check the prices and conditions to limit errors. When you are satisfied, click on the orange button Next Step
 .
.
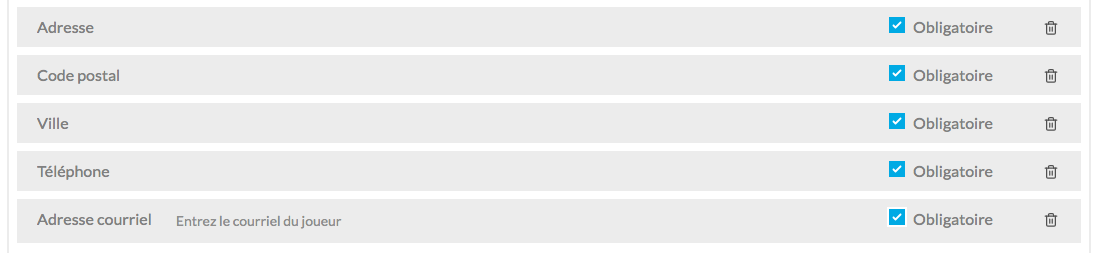
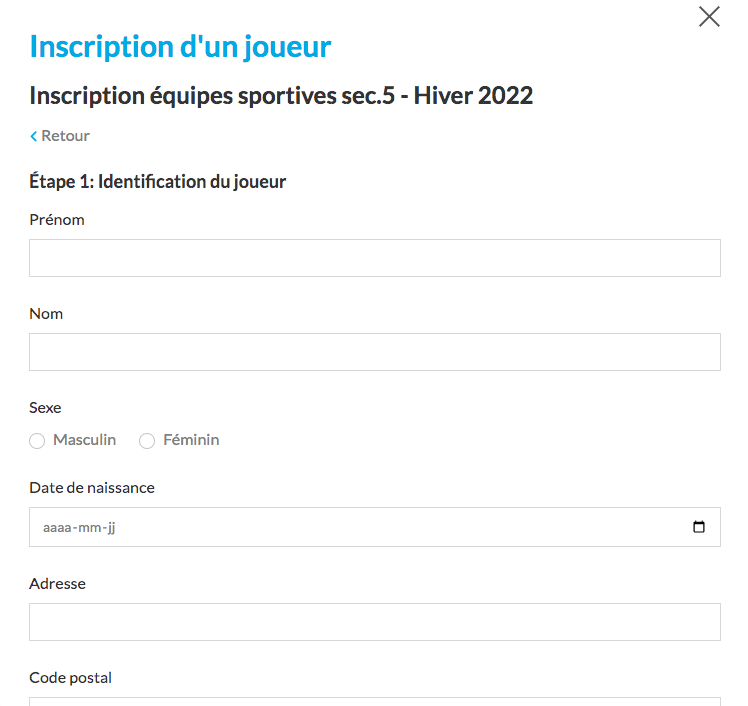
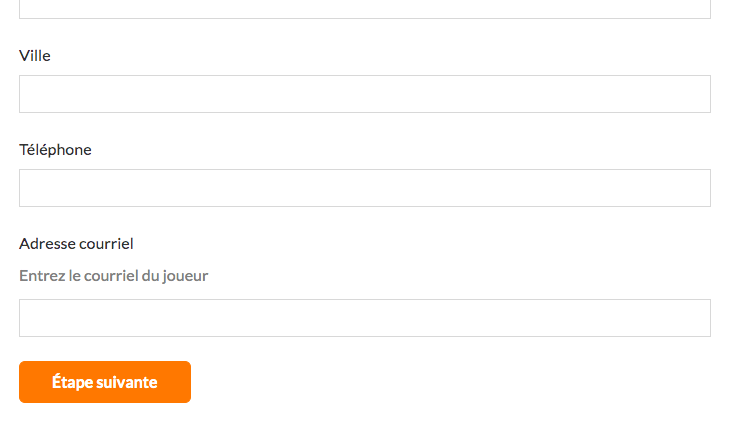
Step 7: Form
In this step, you must adapt the form that will be sent to parents or players to complete their registration.
Here are the tasks you need to do:
1. Check the boxes *Create a contact* from the information in this step.
If this is not checked, players will not receive an invitation link!

2. Check the fields that you consider mandatory. Note that there are mandatory fields and mandatory steps.
3. Add fields to the different stages according to your preferences (optional). To do this, click on Add a field in the stage that suits you.
4. Add a section to customize your form.
As an example, you could add a Health Profile section to gather important information about the registrant’s health status. To do so, scroll down to the bottom of the page and click on Add a section. Add the section name. Then, add the desired fields.
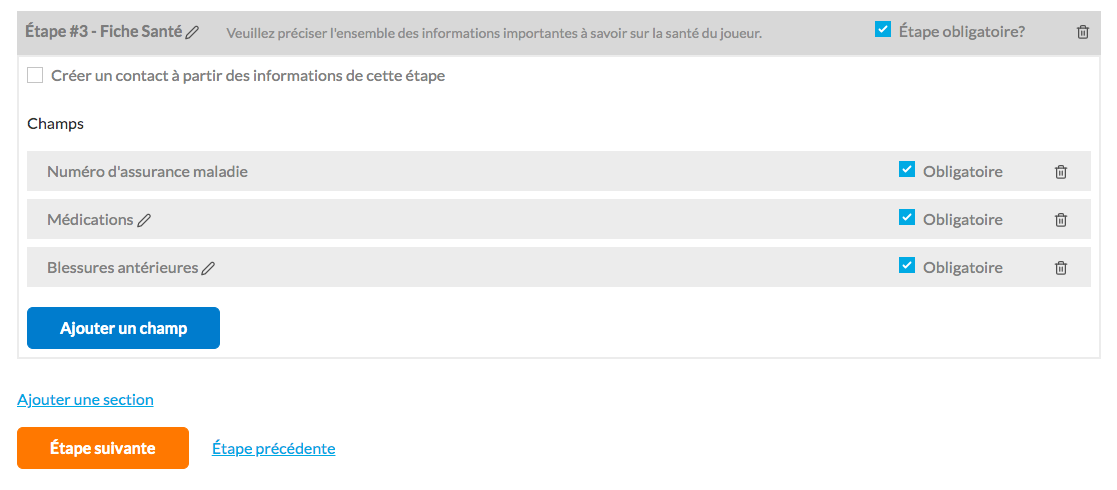
Once you are satisfied with your form, click on the orange button Next Step at the bottom of the screen.
Step 8: Payment
In this step you must choose:
- the accepted means of payment
- whether it includes taxes or not
- the maximum time of payment after registration
- add reminders for unpaid registration
- add additional payment instructions.
It is recommended to add at least one reminder for unpaid registration in order to take full advantage of the automated functions of MonClubSportif and to facilitate your management.
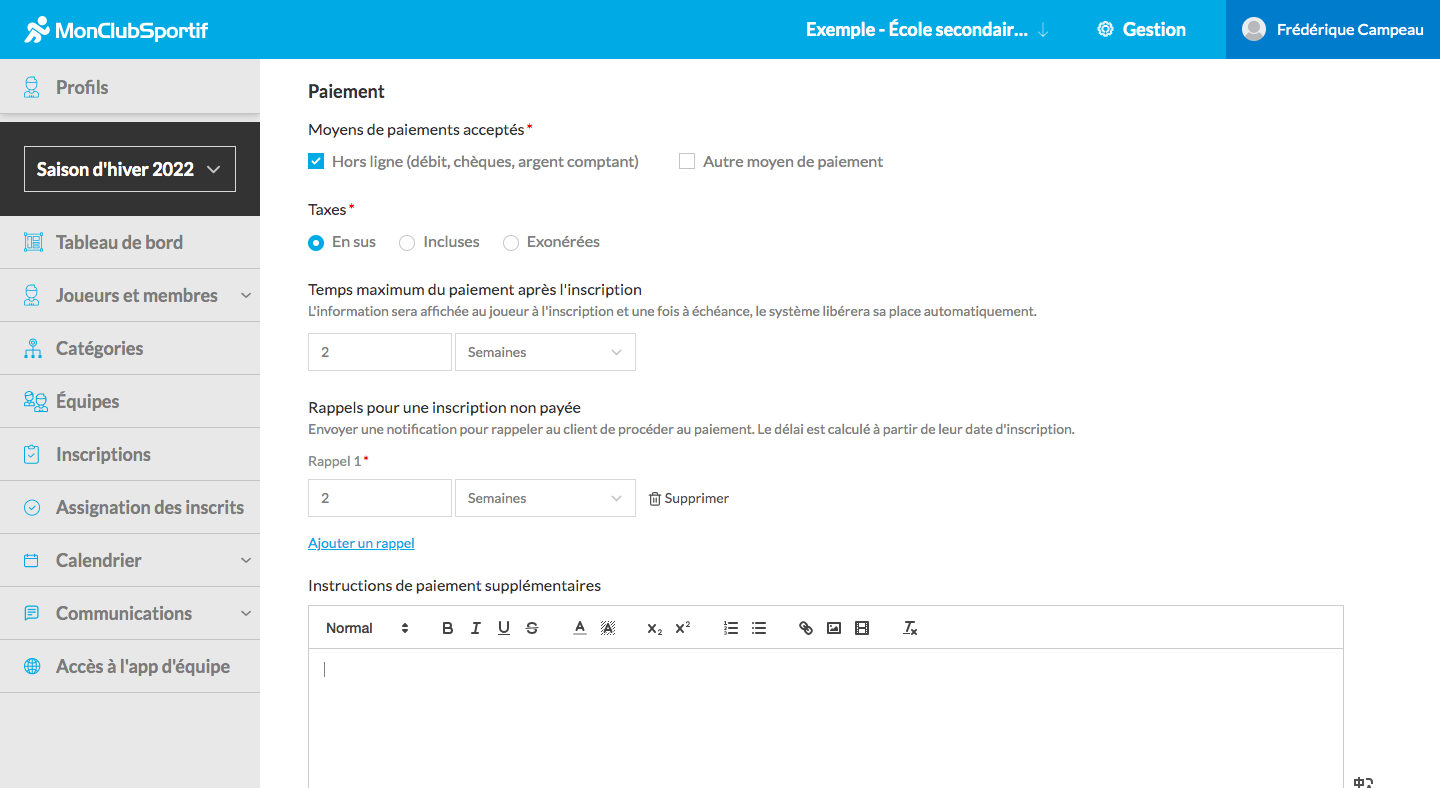
Once all fields are completed, click on the orange button Next Step.
Step 9: Terms and Conditions
Now is the time to add all the terms and conditions specific to your organization.
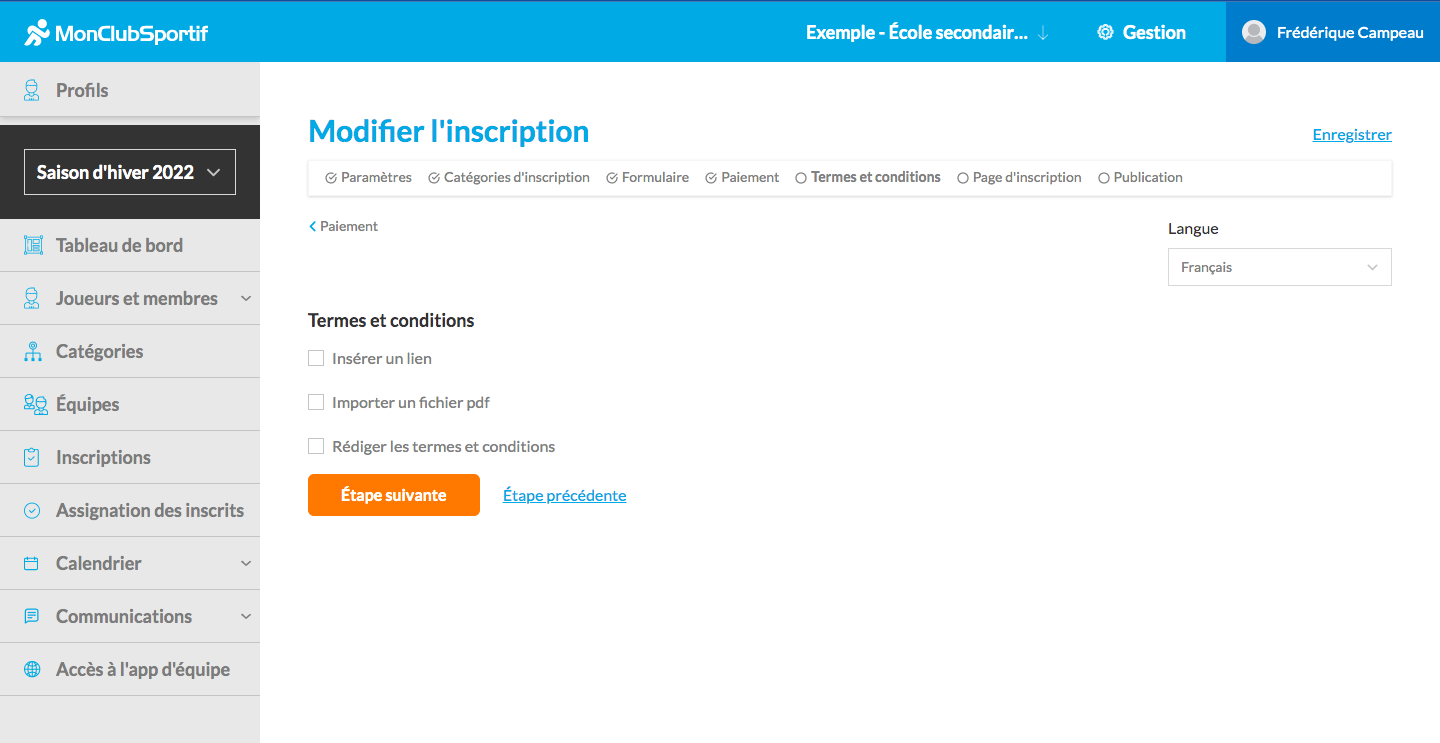
To do so, you are invited to :
-Insert link(s)
For example, in my school, it is required that the athlete has a minimum 75% GPA in order to participate in a sports team. I must therefore add or copy and paste this link.

-Import a PDF file

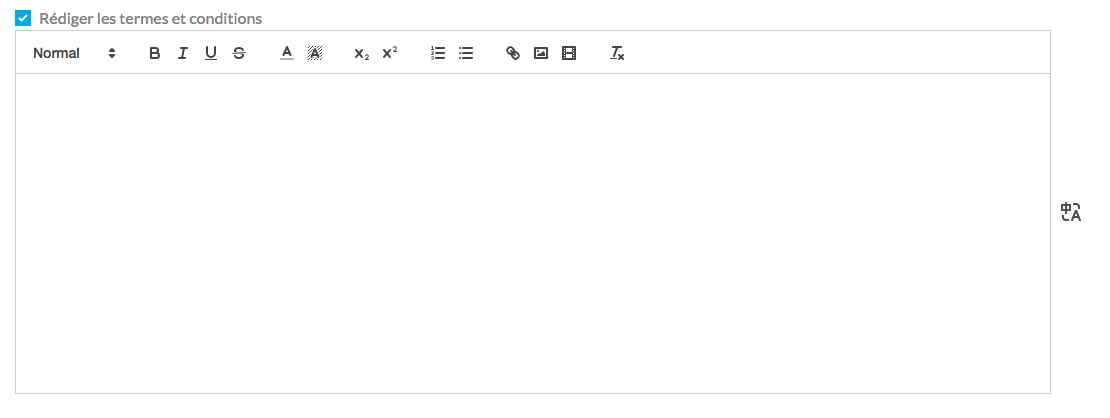
-Write your terms and conditions
Once all fields are completed, click on the orange button Next Step.
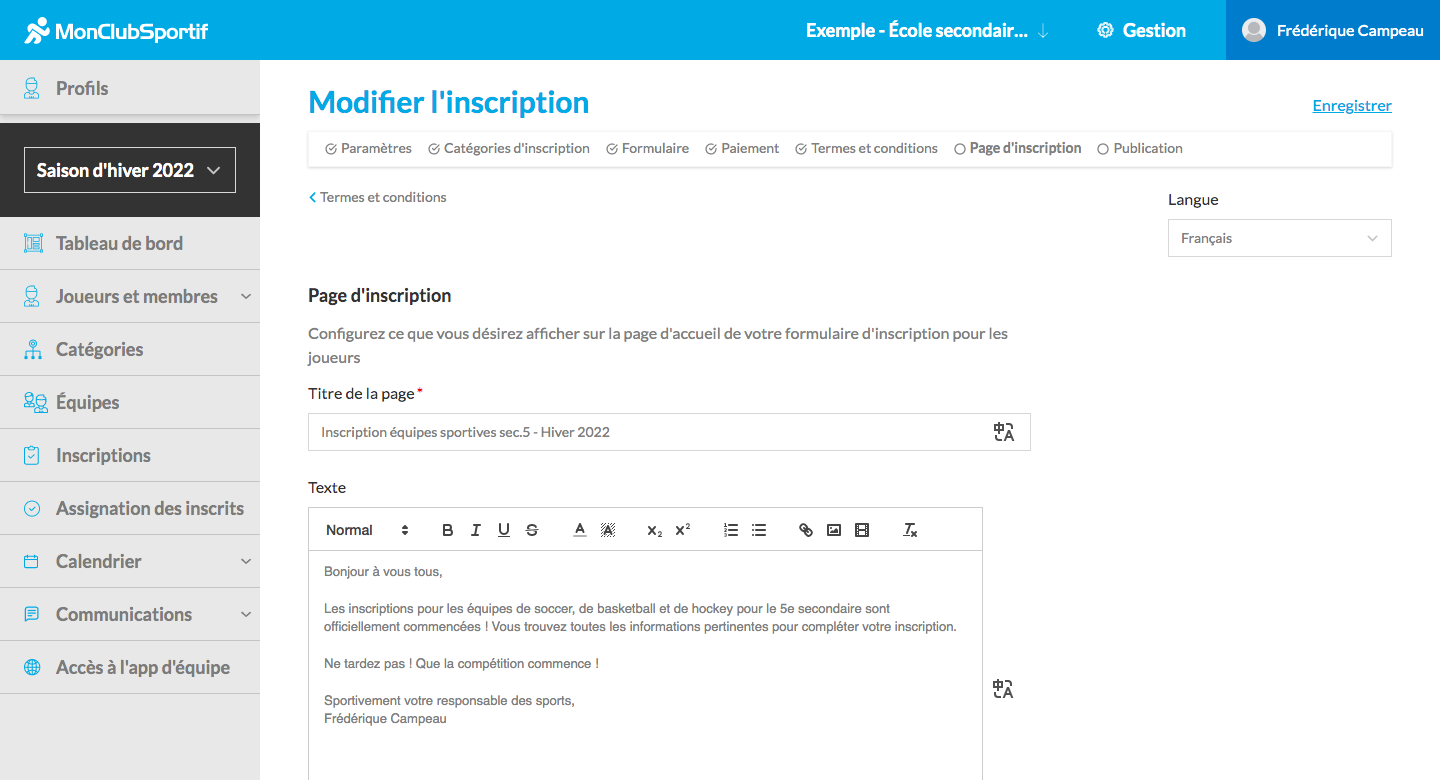
Step 10: Registration pages
That’s it! You are almost done with your registration. Now you need to set up what you want to display on the home page of your player registration form. All you need to do is add the page title and your text
Once all fields are completed click on the orange Next Step button.
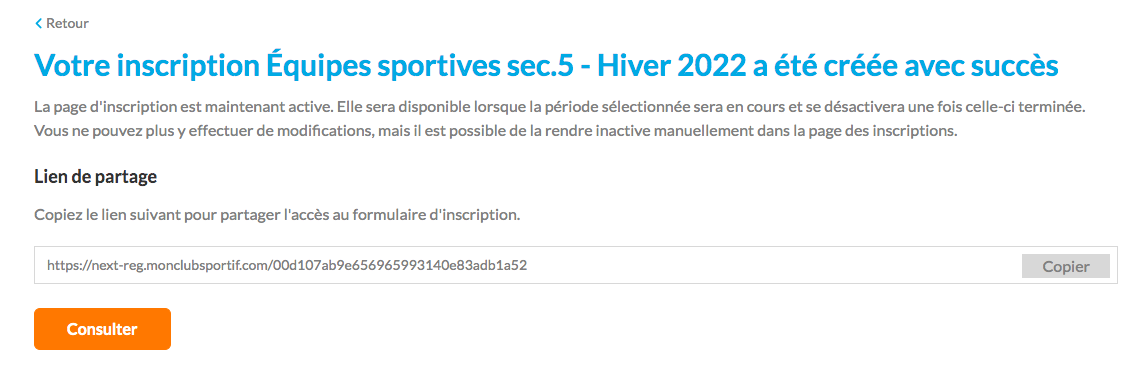
Step 11: Publish
You have finally completed your registration process.
You just have to check that the information presented in the summary is correct.
Be careful! It will be impossible to modify it once published!
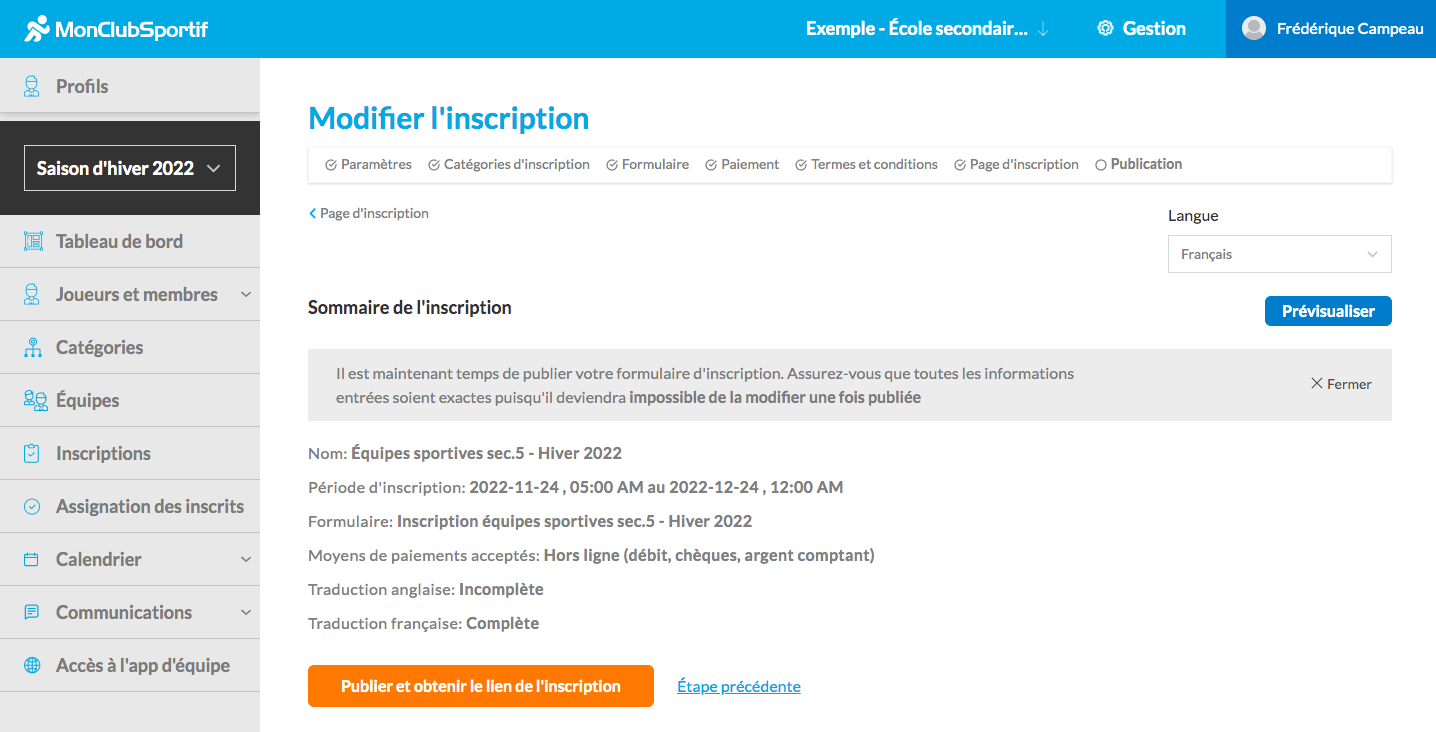
You can also preview your publication by clicking on the blue Preview button on the right. A page will open and show you the entire registration form that you have just configured. You can then analyze if all the information is present and correct.
Be careful! Make sure you scroll down to the bottom of the page. This way, you will have access to the Next Step button. You will be able to see all the pages of
Next, click on the orange Publish button and send the registration link.
You can now copy and paste the link that appears on the screen to share access to the registration form.