Congratulations! You have chosen to simplify your sports team management tasks. Now, you need only follow these steps to create your team on MonClubSportif.
Step 1: Visit the MonClubSportif website at the following address: https://monclubsportif.com/
Step 2: Complete the fields in the form at the top of the page.
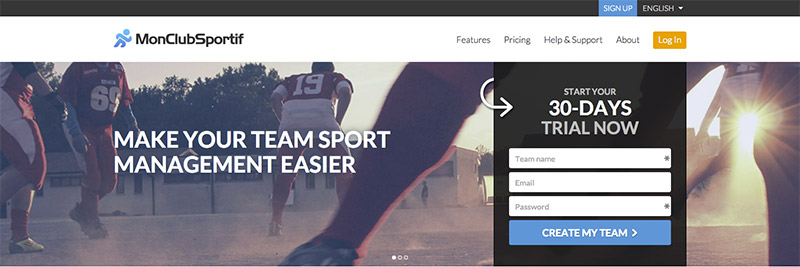
Once completed, click on “Create my team” and you will be redirected to the next form for your team to complete your registration.
Step 3: Once you are on the next form, complete the required fields.
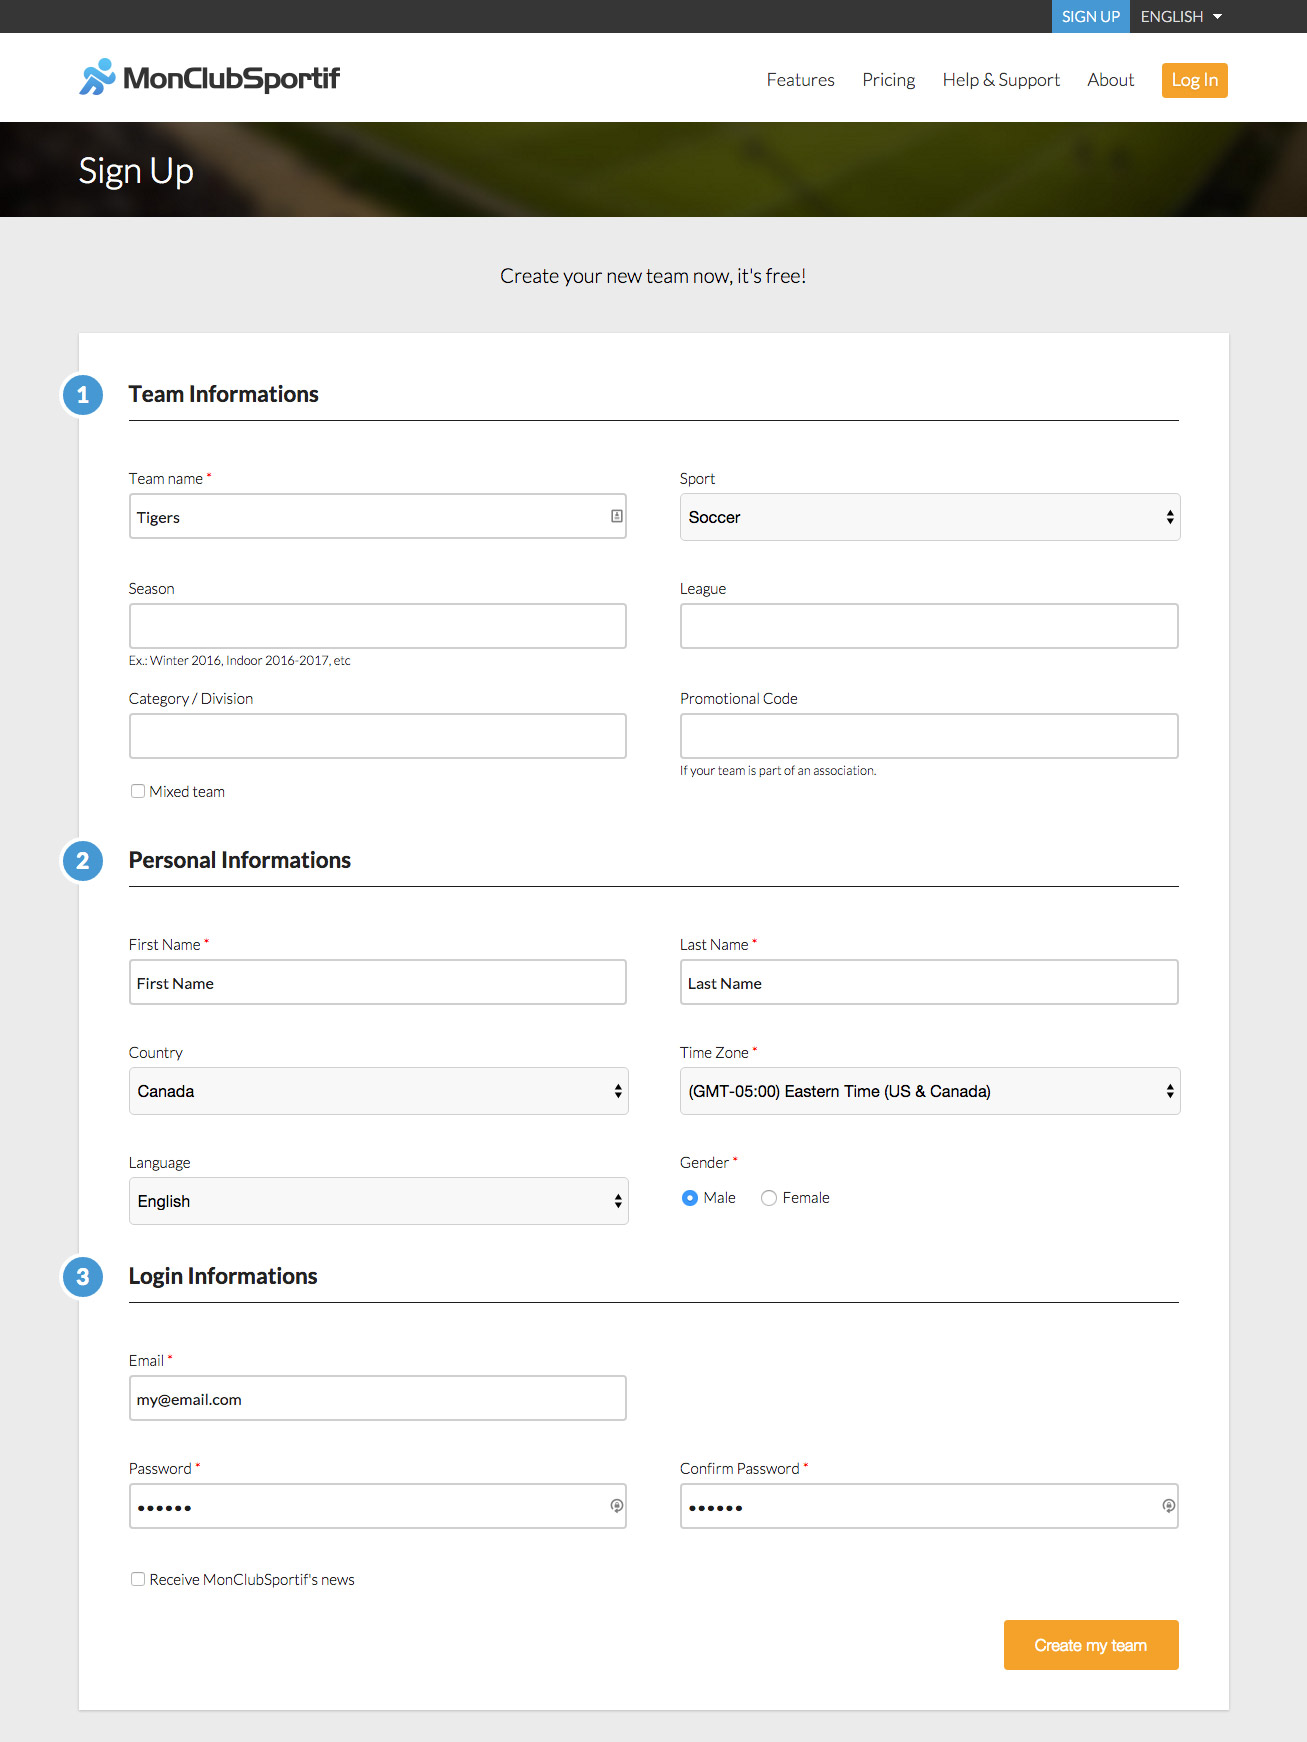
Once the fields have been completed, click on the “Create my team” button to proceed in the creation of your sports team.
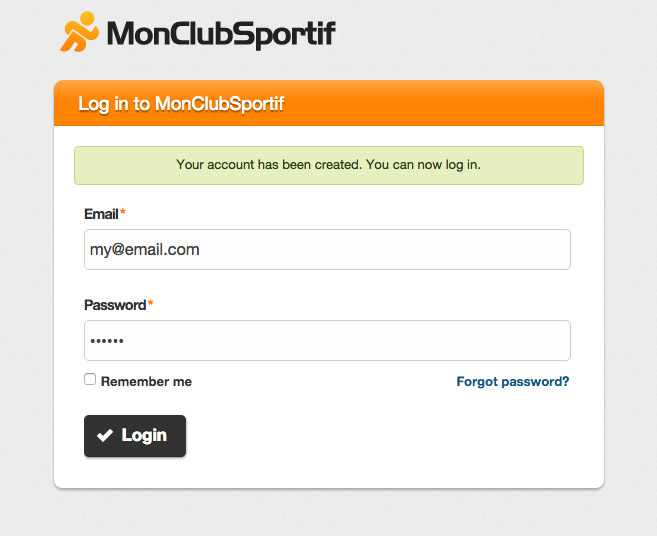
Step 4: When your team has been created, you will be redirected to the registration page so that you can already manage your team.
To connect, use the information that you have captured as registration information in the previous form.
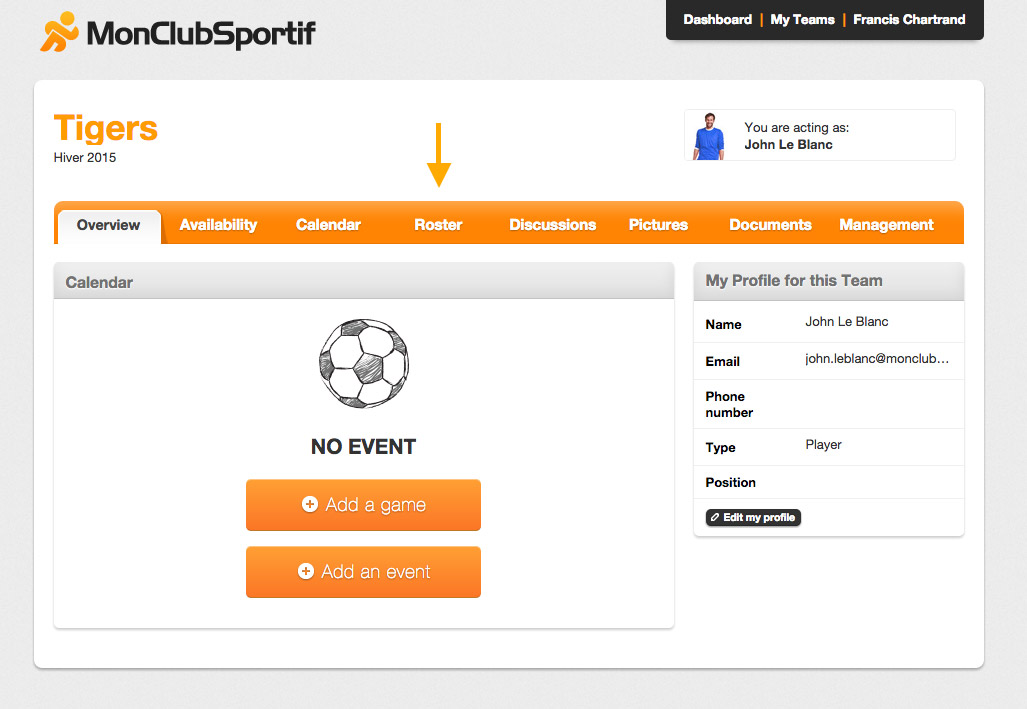
Step 5: As the arrow indicates, you can begin adding players to your team. To do this, click on the “Roster” link which is found underneath the arrow.
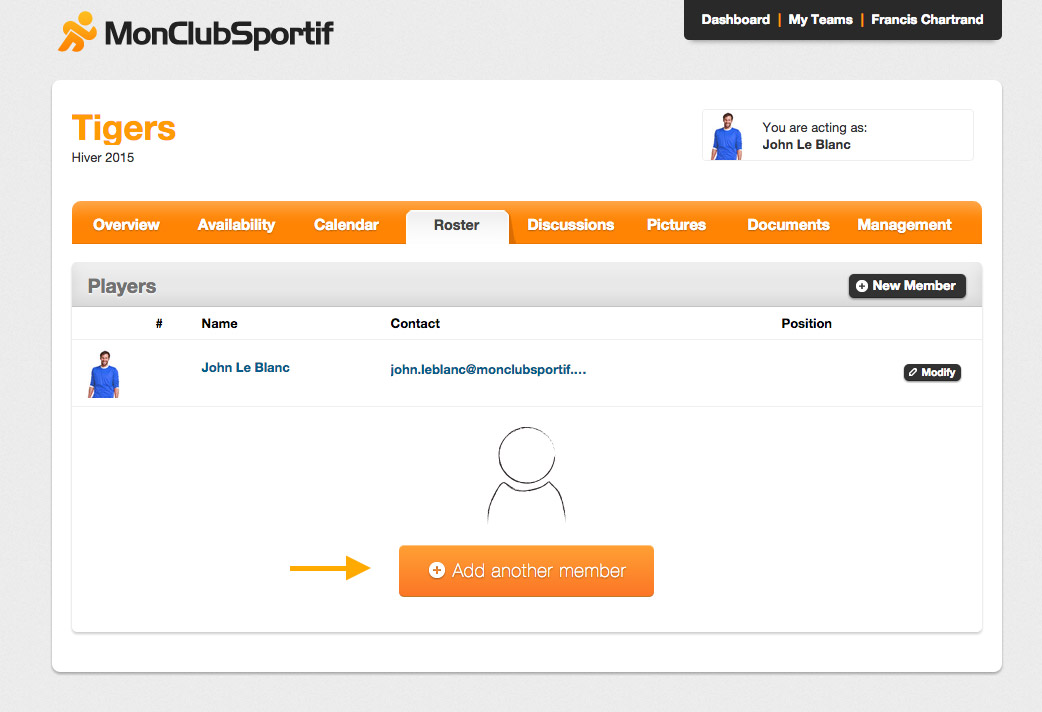
Step 6: Again, as the arrow indicates, if you wish to add new players, click on the “Add another member” button.
Step 7: To add a player, complete the required fields with this member’s information and details.
If you wish to give management rights of your team to one of these members, tick the block “Access to team management”.
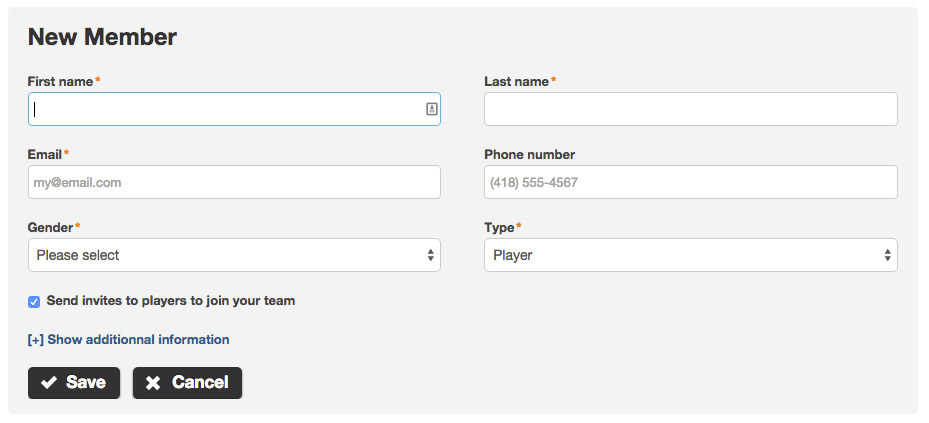
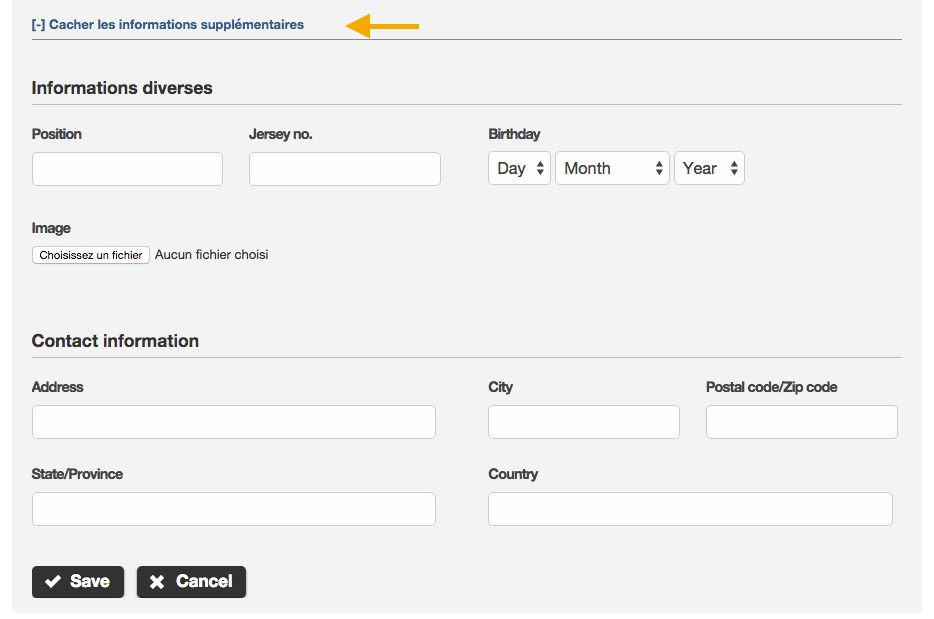
Additionally, if you wish to add more information on this member than the basics, click on “Show additional information” to complete additional fields and additional information regarding the member.
When you have captured all the necessary information and you are ready to register this member, click on the “Save” button that the arrow indicates.
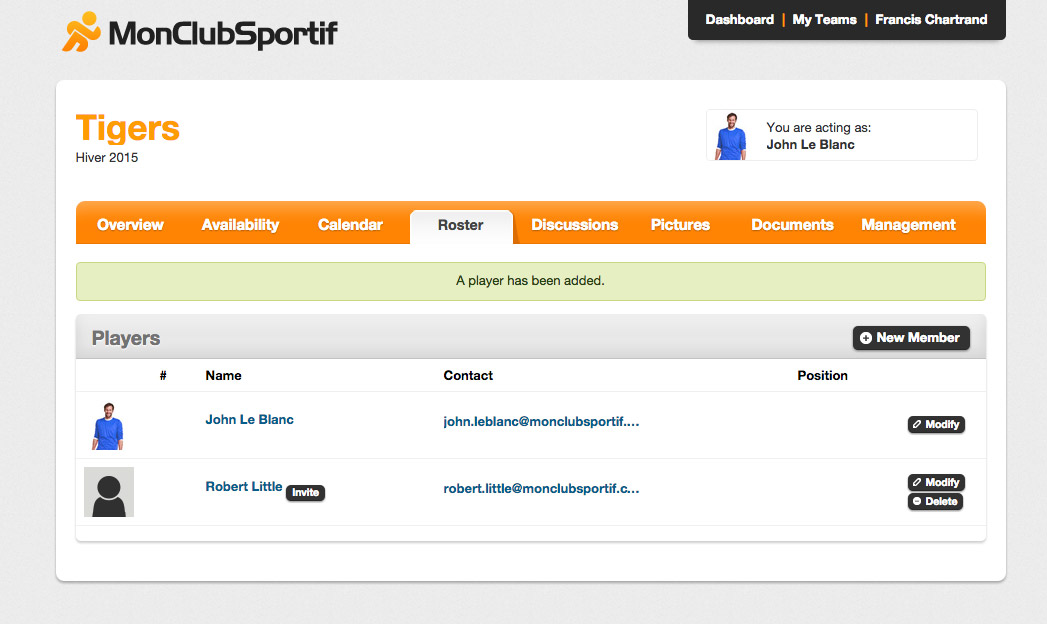
Step 8: Well done! A confirmation message will appear to confirm the addition of this member to the team. You can now congratulate yourself for your first member to your team.
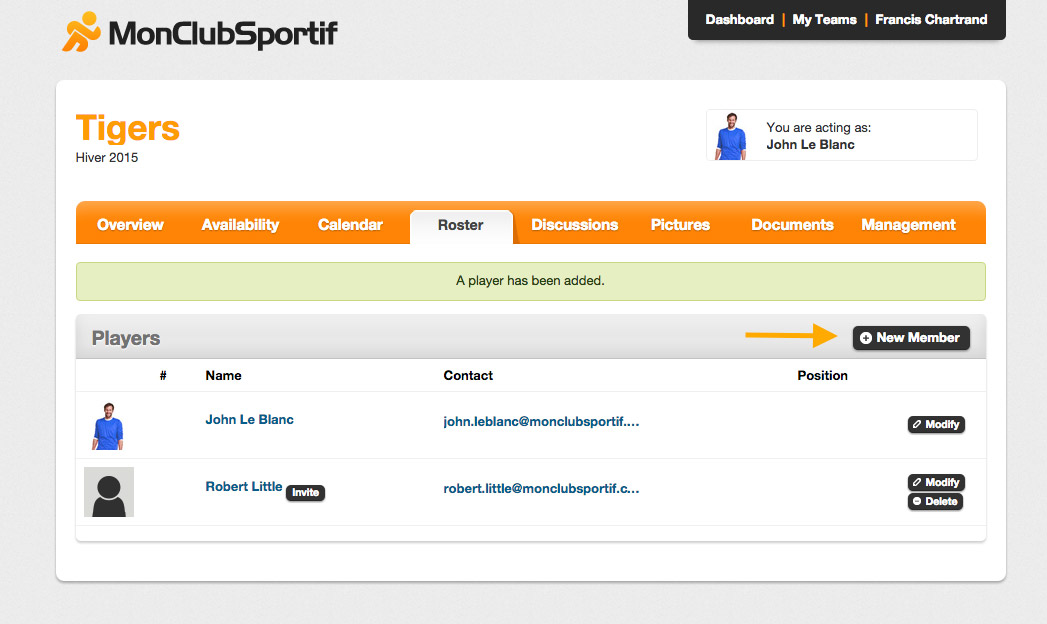
Step 9: To add other players, click on the “New member” button. this will bring up a form to add a new player to the team. This is the same type of form that you have just completed for your first player. You just need to complete the same process, meaning to complete the required fields.
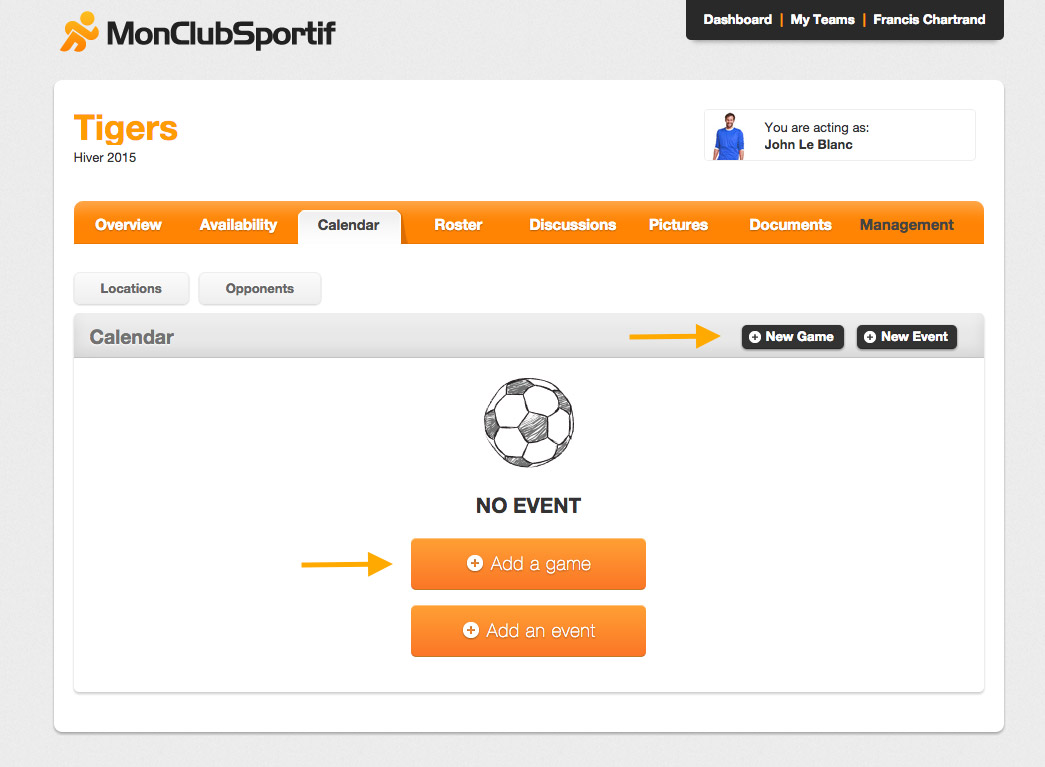
Step 10: Once all the players have been created, you can now begin to plan your team’s events and matches. To do this, click on the “Calendar” link which is found to the left of the “Roster” tab.
Step 11: In the “Calendar” page, as you have not yet created an event or match, there are two buttons to help you create one. To do this, click on “Add a game” or “Add an event” according to the applicable situation that you wish to add to the calendar.
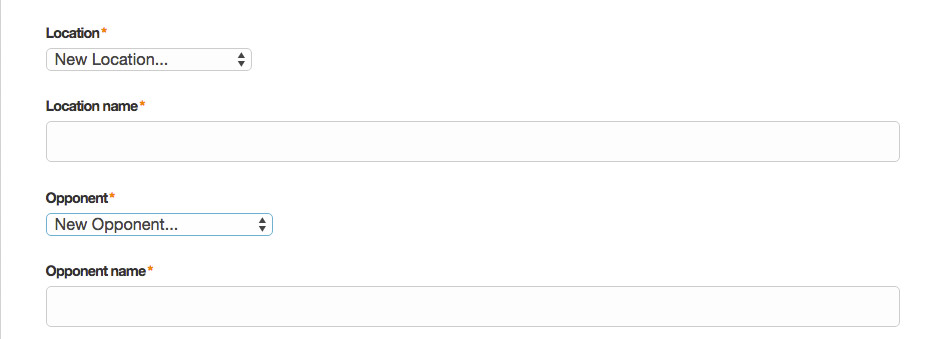
Step 12: According to the choice that you have made, if it is a game, this is the type of form that you will need to complete to create your first match.

Because this is the first element that you are adding to your team, there is a good chance that you will need to add a “Location” and an “Opponent”. To do this, you simply need to choose “New Location…” or “New Opponent…” from the drop down menu to display the field which will enable you to display the place and opponent.
If it is an event that you wish to create, this is the type of form that you will need to complete:
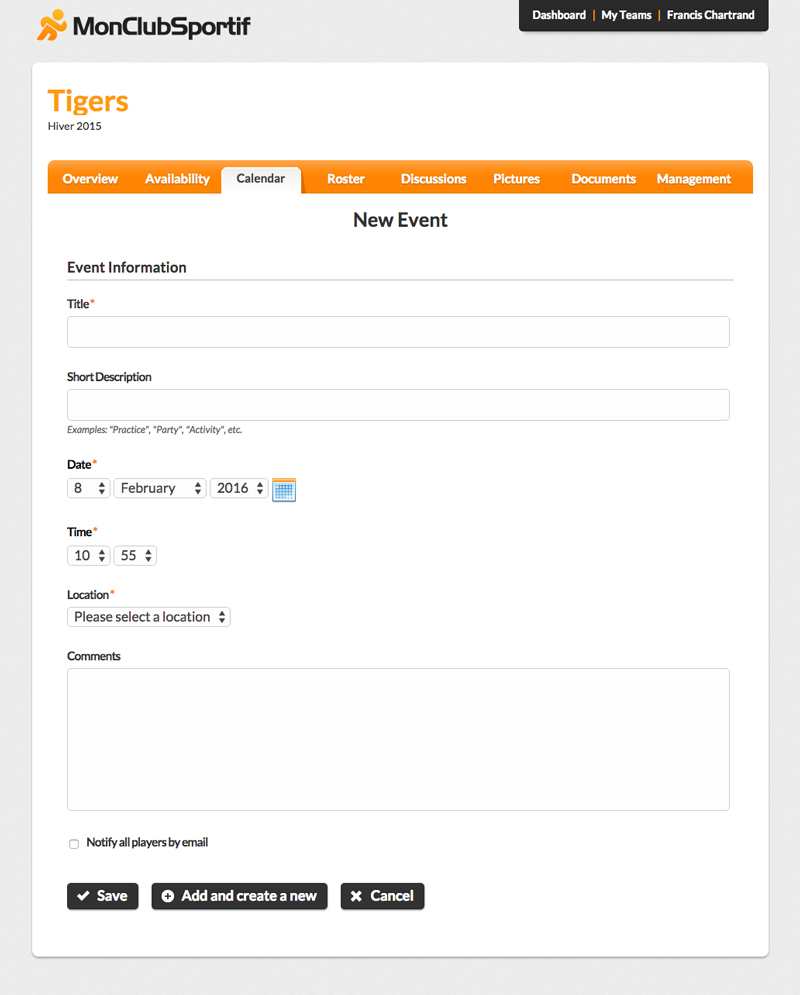
Once the fields have been completed, click on “Save” to add the element to your calendar or if you wish to add another element after this, click on “Add and create a new”.
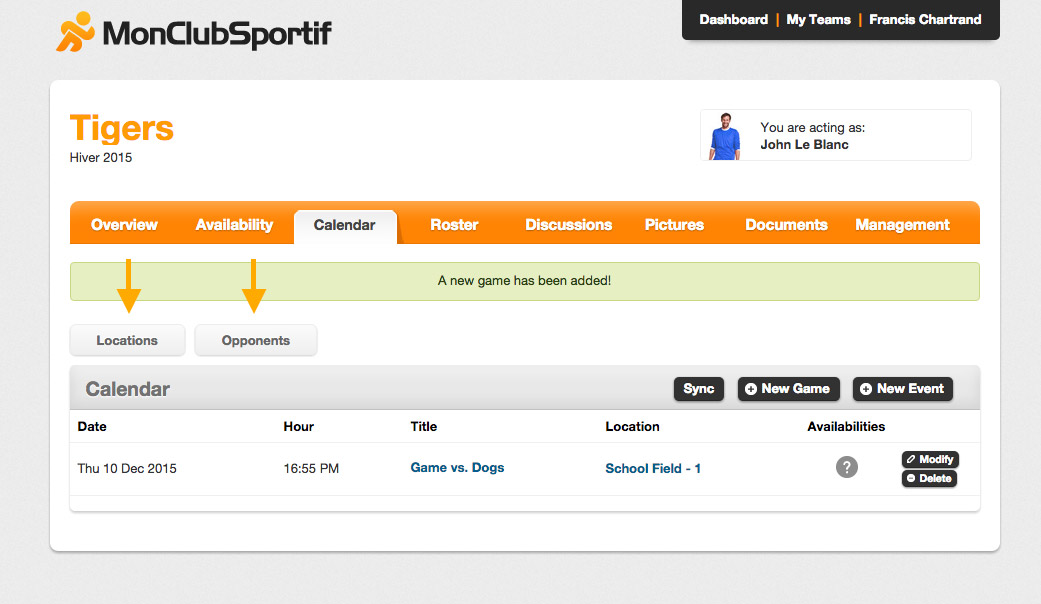
Step 13: Well done! You have created your first calendar elements. To add others, simply click on the “New Game” or “New Event” buttons and you will need to complete the same forms that you have just completed.
Step 14: As you have now at least created a place and an opponent, you can complete their details. To do this, click on the “Locations” or “Opponents” buttons above the “Calendar” heading.
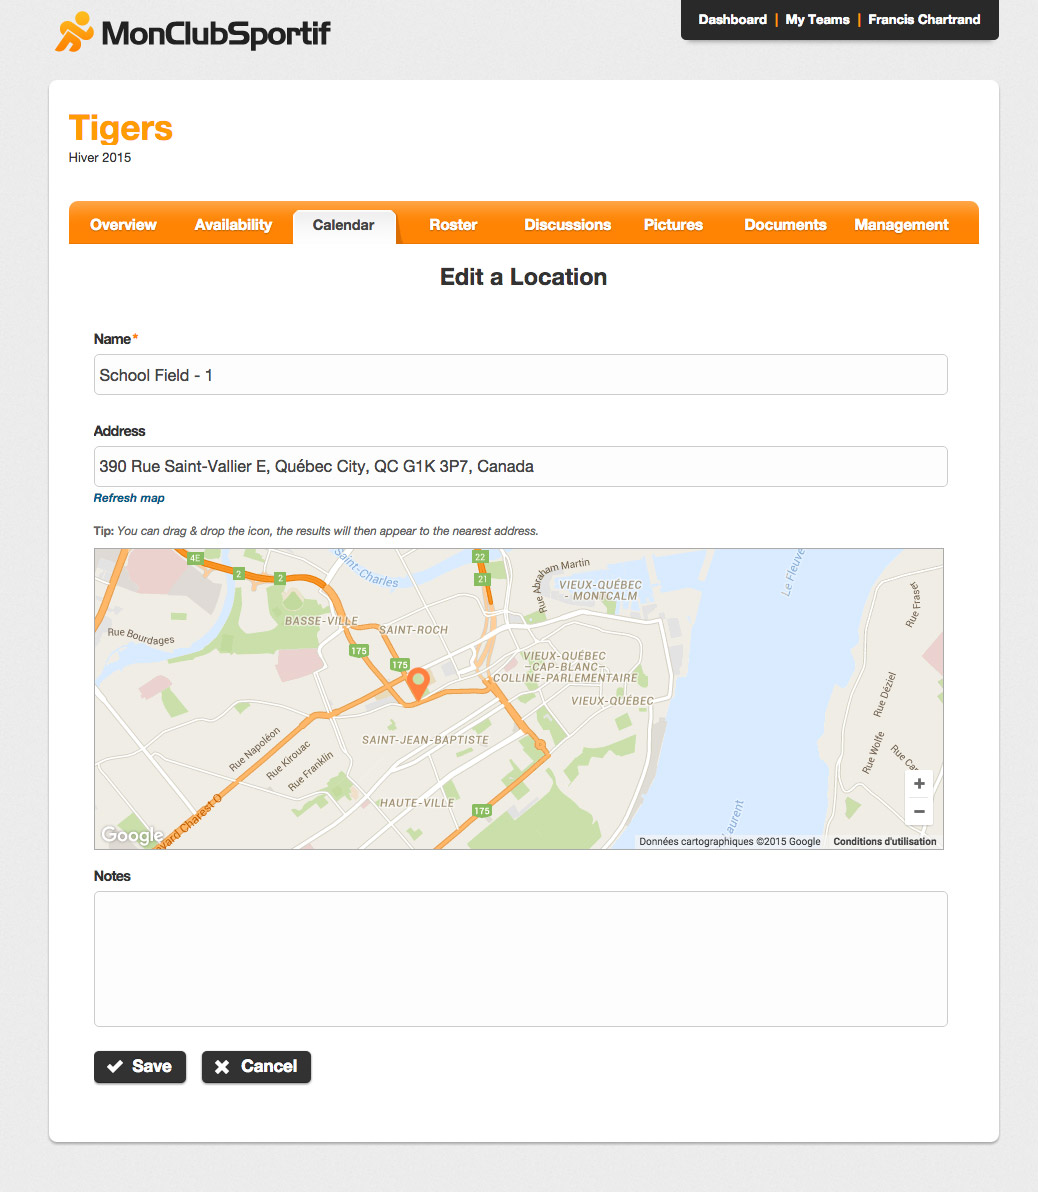
Step 15: For locations, if you make a change on one of them by clicking on the “Modify” button, you can capture the address of the place in order to place it on the map.
For opponents, if you make a change to one of them by clicking on the “Edit” button, you can capture notes regarding this opponent.
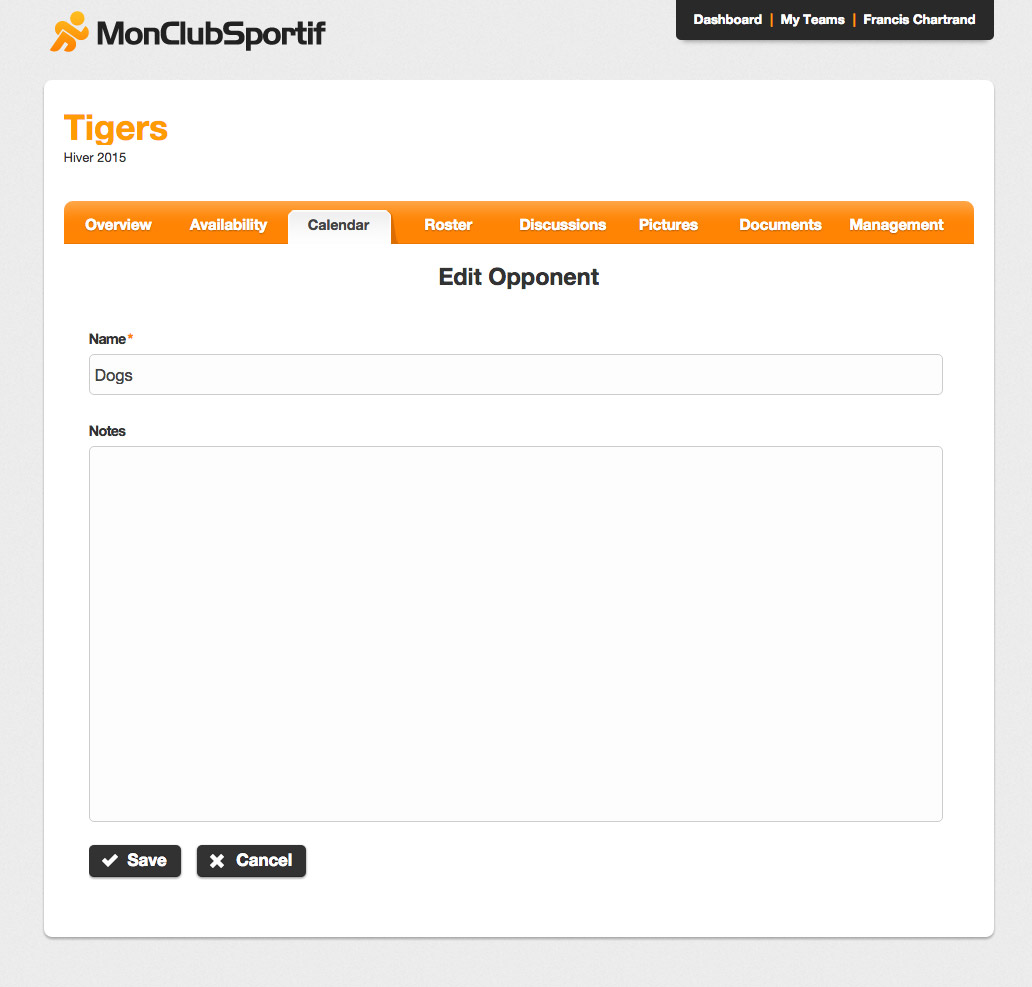
Once changes have been made to these locations or opponents, you simply need to click “Save” to keep the changes.
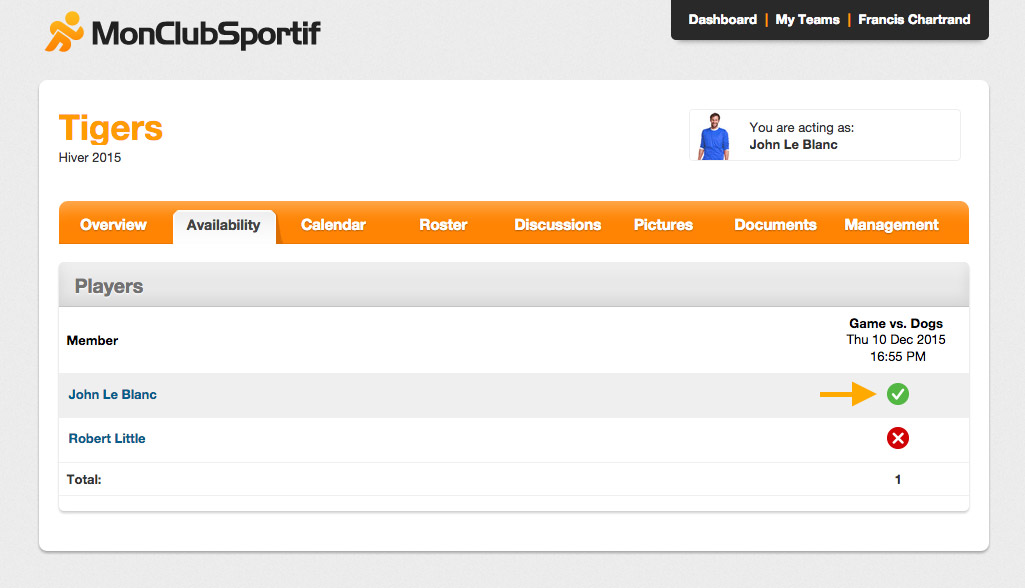
Step 16: To set your availability for a game or an event of your team, click on the “Availability” tab located to the left of the currently selected “Calendar” tab.
Step 17: Once on the page, ensure that you select the correct column, either the match or event you want, and click on the icon which is found on the same line as your name. Each time you click on the icon, this will change your availability.
- The green checkmark indicates that you will be present.
- The red X indicates that you will not be present.
- The blue question mark indicates that you do not know if you will be there.
- The gray question mark indicates that you have not yet given an answer and it is therefore the default answer.
As events and games are linked to specific teams, if you have several teams, ensure that you have chosen the correct team. To check which team you are in, your team’s name is written in orange at the top of the pages sunder the MonClubSportif logo. If you are not in the correct team, you can change teams by hovering over “My Teams” in the gray block at the top of the page to the right of the MonClubSportif logo. When hovering, you will see all the teams of which you are a member.